
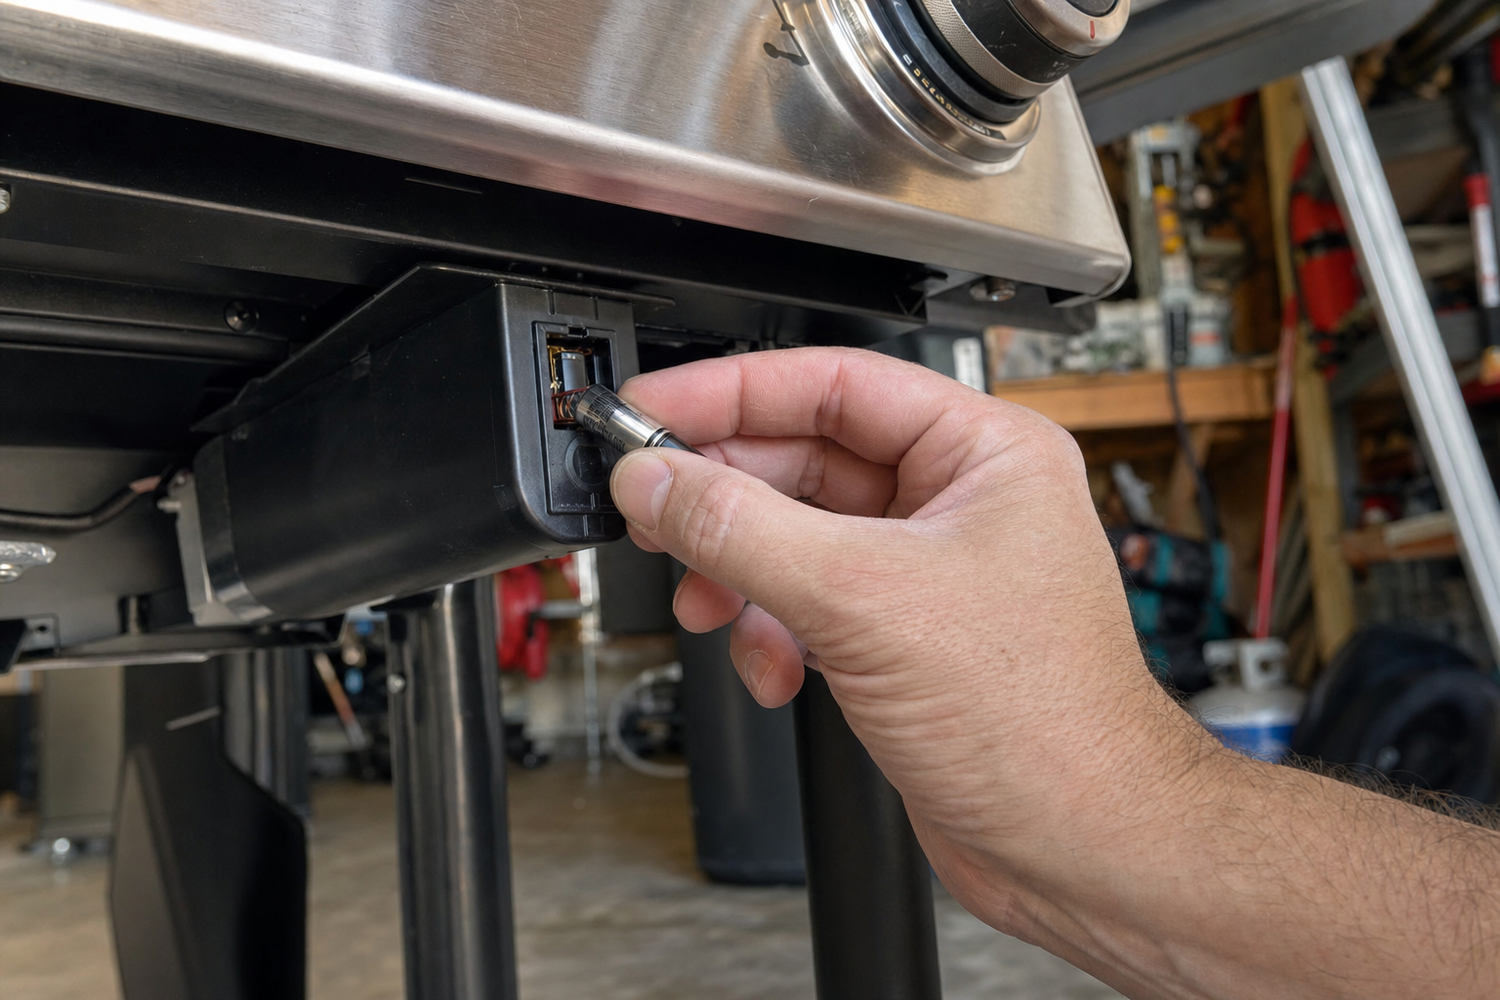
You press the igniter button. Nothing. No click, no spark, no whoosh. You press it again. Still nothing. You pull out the long lighter from the kitchen drawer, light a single burner through the side, and tell yourself you will deal with the igniter later. Six months later, you are still using the long lighter.
Here is the part the grill industry quietly knows and you probably do not: roughly 60% of "broken" grill igniters are not broken. They have a dead AA battery, a corroded contact, a grease-covered electrode tip, or one frayed wire. Total cost to fix all four: about $1.50, twenty minutes, and zero specialized tools. The replacement igniter kit you were about to buy on Amazon is the wrong answer to a problem you have not actually diagnosed.

How Grill Igniters Actually Work
Almost every modern grill uses one of two igniter types. A piezoelectric igniter is purely mechanical -- pressing the button slams a spring-loaded hammer into a quartz crystal, which generates a high-voltage spark with no battery required. You hear one hard snap per press. A battery-powered electronic igniter uses a single AA or AAA battery to power a module that delivers continuous clicking sparks across one or more electrodes. You hear a rapid click-click-click while you hold the button.
Per The BBQ Depot's troubleshooting guide, the difference matters because the failure modes are different. Piezo igniters fail mechanically -- cracked crystal, broken hammer spring, or a button that no longer engages the hammer. Electronic igniters fail electrically -- dead battery, corroded contacts, grease-covered electrode, or a broken wire somewhere in the circuit. The diagnostic path is different for each.
Step 1: Identify Your Igniter Type
If pressing the button produces a single hard click, you have a piezo igniter. If pressing and holding the button produces rapid click-click-click, you have a battery-powered electronic igniter. If you hear nothing at all, that itself is diagnostic information -- piezo igniters can fail completely silent if the crystal shatters, and battery-powered igniters go silent when the battery is dead.
Check your grill's side panel or documentation for a battery compartment. If there is a compartment, you have an electronic igniter. If there is no compartment anywhere on the grill, you have a piezo igniter.
Step 2: Battery-Powered Igniter -- Start Here
If you have an electronic igniter, the battery is the first thing to check -- not the last. Dead batteries cause the majority of electronic igniter failures and take thirty seconds to rule out. Remove the battery (almost always a single AA, occasionally AAA), replace it with a known-good battery, and test. If the igniter now works, you are done. If it still does not work, continue the diagnostic below.
Battery compartments on grills are frequently exposed to heat and humidity. The contacts inside corrode. Even with a new battery installed, a corroded contact may not transmit enough current to fire the igniter module. Use fine-grit sandpaper or a pencil eraser to clean both the positive and negative contacts inside the compartment. Reinstall the new battery and test again.
Step 3: Inspect the Electrode Tip
The electrode is the small ceramic rod with a metal tip that sits near the burner. It is where the spark actually jumps to ignite the gas. On any grill that has been used more than a few times, the electrode tip accumulates grease, carbon, and food debris. A coated electrode tip cannot spark reliably because the insulating debris prevents the arc from forming or deflects it away from the gas stream.
Clean the electrode tip with a dry cloth or paper towel. If there is heavy buildup, use a stiff-bristle brush and isopropyl alcohol. Do not use water -- water trapped in the ceramic insulator can crack it during heating. After cleaning, check that the electrode tip is positioned correctly: it should be about 3 to 4 millimeters from the burner tube, pointing toward the gas ports. Char-Broil's igniter troubleshooting guide specifies that the gap between the electrode and the burner should be approximately 3mm -- too wide and the spark cannot jump, too narrow and the tip shorts out against the burner.
Step 4: Check the Wiring
Electronic igniters have a wire running from the igniter module (near the button) to the electrode at the burner. This wire runs through the grill body and is exposed to heat, vibration, and occasional contact with grease. Inspect the full length of the wire for fraying, cracking, or bare spots where the insulation has worn away. Look at both connection points: where the wire meets the igniter module and where it connects to the electrode.
A wire that looks intact may still have an internal break. If you have a multimeter, test continuity from the module end to the electrode end. No continuity means the wire has an internal break and needs replacement. Replacement igniter wires are available from grill manufacturers and third-party parts suppliers for $5 to $15.
Step 5: Test for Spark Without Gas
Turn off the gas supply entirely. Press the igniter button in a dim environment -- a garage with the lights off, or indoors if you have moved the igniter component. You should see a spark jump at the electrode tip if the igniter is functioning. If you see a spark, the igniter is working and the problem is with gas flow or burner positioning, not the igniter itself. If you see no spark after completing all the previous steps, the igniter module itself has failed and needs replacement.
What Igniter Replacement Actually Costs
A replacement igniter module from the original manufacturer for a mid-range gas grill runs $20 to $45. Universal replacement kits from third-party suppliers -- which work with most standard electrode configurations -- run $10 to $25 and include the module, electrode, wire, and mounting hardware. The installation process on most grills requires removing two or three screws to access the existing module, disconnecting the wire, connecting the new module, and routing the new wire to the electrode position. Most replacements take under 30 minutes.
Before ordering any replacement part, verify that you have completed all four diagnostic steps above. A $25 igniter kit purchased before diagnosing a dead AA battery is $25 wasted. The diagnostic process is designed to rule out the cheapest possible causes first -- because statistically, the cheapest possible causes account for the majority of failures.